Accounting Finance:Supplier Accounts-Setting up a New Supplier in InfoNet
Overview
By the end of this course, you will be able to:
- Enter a new supplier using Infonet Business Partners and CNS
Setting up a New Supplier in Infonet
- 1. Log onto https://infonet.unipharm.com
- 2. Enter User Name
- 3. Enter Password
- 4. Click Login
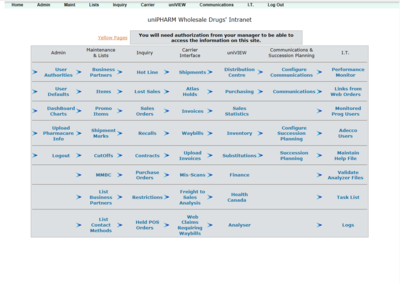
- 5. Under Maintenance & Lists, click Business Partners
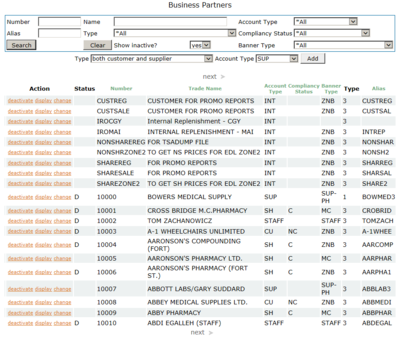
- 6. Select both customer and supplier from the Type drop down menu
- 7. Select SUP from the Account Type drop down menu
- 8. Click Add
IMPORTANT: Always pay attention to purple warnings and red alerts. Also put important information (this may include hours of operation or account changes) in the NOTES section. Be sure to mark each note with the day and your initials. For instance, if you made a note on June 12th, 2017, write (061217CM) after the note.
Entering Basic Data
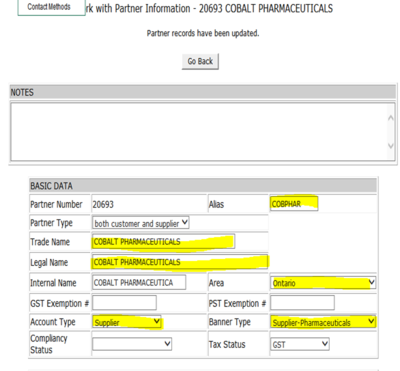
- 1. Enter Alias (first 3 letters of first name and first 4 letters of second)
- 2. Enter Trade Name (operating name)
- 3. Enter Legal Name (optional)
- 4. Select Area
- 5. Select Supplier from the Account Type drop down menu
- 6. Select Banner Type
- 7. Click Validate
After validating, tax status GST will populate.
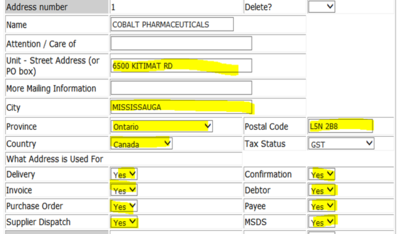
Entering Address Data
- 1. Enter Attention/Care of (if applicable)
- 2. Enter Unit - Street Address
- 3. Enter City
- 4. Select Province
- 5. Enter Postal Code
- 6. Select Country
- 7. At least one field must be Yes in the What Address is Used For section, select appropriate ones
- 8. Click Validate
After validating, tax status GST will be populated.
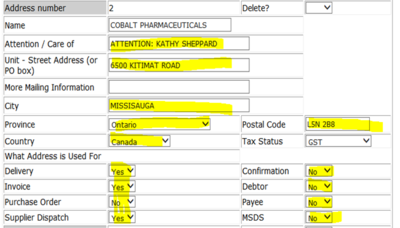
- 9. Enter Address number 2 (if applicable)
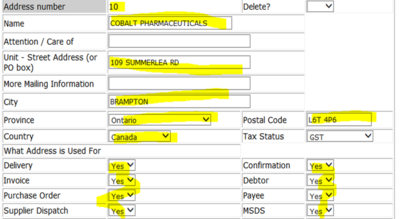
- 10. Enter Address number 10 (used by Returns if applicable)
- 11. Enter Attention/Care of (if applicable)
- 12. Enter Unit - Street Address
- 13. Enter City
- 14. Select Province
- 15. Enter Postal Code
- 16. Select Country
- 17. At least one field must be Yes in the What Address is Used For section, select appropriate ones
- 18. Click Validate
After validating, tax status GST will be populated.
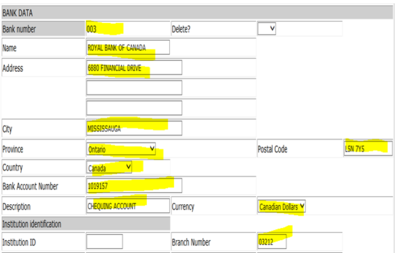
Entering Bank Data
- 1. Enter Bank number
- 2. Enter Name
- 3. Enter Address
- 4. Enter City
- 5. Select Province
- 6. Enter Postal Code
- 7. Select Country
- 8. Enter Bank Account Number
- 9. Enter Description (type of account)
- 10. Select Currency
- 11. Enter Branch Number (must be 5 characters)
- 12. Click Validate
- 13. Select A/R Payment Mode (only enter for EFT or CC) (if applicable)
- 14. Select A/P Payment Mode (only enter for EFT or Cheque)
- 15. Click Validate (Bank drop down menu does not appear until you have validated)
- 16. Select A/P Bank
- 17. Select A/P Account
- 18. Select Yes from the Default drop down menu
- 19. Enter 1 in the Sequence field
- 20. Click Validate
Entering EDI Distribution Data
- 1. Activate any applicable EDI Type
- 2. FINEDI should be Yes only if the supplier is set to be paid via EFT and/or 810 EDI invoice
- 3. Click Validate
Entering Customer and A/R Data
- 1. Enter Primary Currency
- 2. Make any other changes
- 3. Enter 5000 (limit for suppliers) into the Credit Limit field
- 4. Click Validate
Entering EOB Numbers Data
The EOB Numbers Data section will automatically be filled
Entering Merchant Data
No Merchant Data entry required for supplier
Entering Price List Data
- 1. Select No Mark-up from the No Mark-up drop down menu
- 2. Enter Start Date
- 3. Enter End Date
- 4. Select Active from the Status drop down menu
- 5. Enter No Mark-up from the Price Look Up Rule drop down menu
- 6. Enter Start Date
- 7. Enter End Date
Entering Restriction Data
No Restriction Data entry required for supplier
Entering Statement Data
- 1. Select the appropriate option from the Statement Distribution drop down menu
- 2. Enter Send to Address
- 3. Enter Send to Contact Name if required
- 4. Click Validate
Entering Supplier and A/P Data
- 1. Make sure the correct A/P Group is indicated (A/P – Trade (Inventory) or A/P – Non-trade (Expense))
- 2. Select Terms of Payment
- 3. Watch out for the Payment Priority (Angela may specify Expenses to be 1 - Do Not Mail)
- 4. Select Primary Currency
- 5. Select Supp Inv Deduction (if available)
- 6. Enter Supp Debit Deduction (if available)
- 7. Enter Supp Returns Deduction (if available)
- 8. Enter Broker Number
- 9. Click Validate
Enter ISO9000 Quality Assurance Data
- 1. Select Yes frp, the ISO9000 drop down menu if certified
Entering User Defined Data
- 1. Enter information into any applicable user defined data fields
- 2. Click Validate
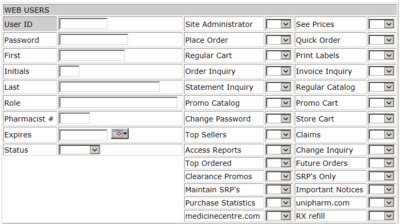
Entering Web Users
- 1. No Web Users entry required for supplier
Updating Partner Information
- 1. Review all entries
- 2. Click Update when you are ready to post into ASW
- 3. Click Go Back
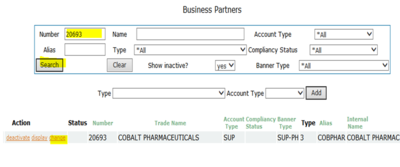
- 4. Enter Number
- 5. Click Search
- 6. Click Change
- 7. Change all PAYEXT to Yes (if EFT is the method of payment)
- 8. Click Validate
- 9. Review all entries
- 10. Click Update when you are ready to post into ASW
Entering Contact Data into CNS
You must continue to enter all new contacts into CNS
Finance:Contacts-Setting up Contacts in CNS
Make sure that every new account has the following:
- 1. Main Info entry with the vendor’s main phone, fax and email
- 2. An RMADEM address also needs to be entered and a RMADEM role code (if applicable)
- 3. Once all entries are completed, proceed to CNS Document Distribution to:
- Link fax number
- Link email address
